Category Archives: Crafts

Can I be crafty? We’ll see.

An adventure in beading

Posted on
An adventure in beading

I was looking into a new hobby to enjoy my time inside during the winter months. More I was looking into beaded items, more I wanted to have some. What better way to have some then making your own?
Since I had never done anything like this and that the tutorials online were not helping much I decided to reach out to Peacock Jewelry in Cochrane, Ab to help out. I took a morning class on beading techniques and Abigail was very patient and shared her knowledge in a private class setting. It was lots of fun. Also she is awesome at assisting me with choices of beads and other related things for my projects.
First thing I did was a bracelet with a size 8 bead because it was easier for me to handle at that point. It`s now sitting in the “one day I’ll finish it pile” where a lot of my first project end up. I just need to put the clasp and it’s done. I wonder why I get so lazy sometimes!
IMG_7711

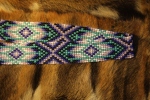
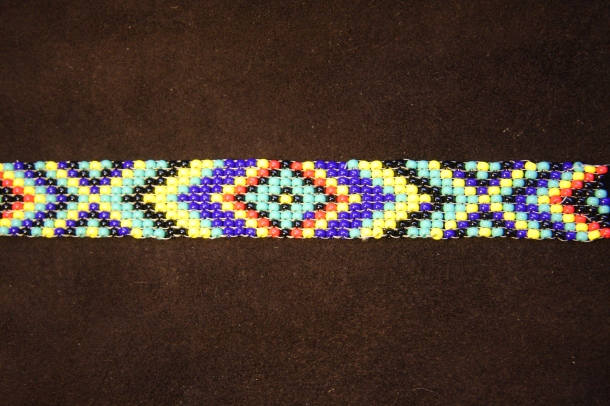
At that point I started to be confident enough to tackle something bigger. So I browsed some patterns online and changed a few colors to get to this belt inlay project. Again I went to consult with Abigail at Peacock Jewelry to get some more material and advice. I’m pretty happy with the result and love the colors I choose. Dally up leatherwork offered to help me transform this inlay into a belt. This project is almost to term and it will be time to go for a visit finish it. Can’t wait to proudly wear it. This project was made with size 8 Miyuki beads.
IMG_7717

Then my third project was a tiny bracelet for Sara, she picked her colors and is now wearing it. I enjoyed working with size 11 beads. It’s much smaller than the 8 beads but makes for a more delicate finish.
20190412_221849

Now that I have gained more experience I have some hat bands project I need started and the next big thing will be the loom, which seems to be a challenge at this point. I quite enjoy making bead work so far, it’s a relaxing craft.

Feel free to visit my facebook page, Silver Fox Creations to see the up coming projects.

Through the windows

Posted on

The other day I was on Pinterest and  I saw some old windows hanging on a wall and thought that it was a great idea. It looked so vintagy rustic. Then I remembered that somewhere in a barn I had a set of 3 old windows gathering dust and cobwebs. I got them in the house and cleaned them all up then got some hardware to hang them. They are now in my office gathering dust on the wall. I’m thinking of doing something with the panes. Seeing the wood wall is nice but I’m thinking that a frosty with a motif effect could put a nice touch.

IMG_6310IMG_6311

I really liked the little pieces of hardware and the crack in one pane. It brings a little special touch to the look. I’m quite happy with how my office is turning to be. These windows were found through Kijiji. I picked them up many years ago thinking of turning them into some frames. As with many of my great intentions the windows found their way in the pile of things I can transform. I’m glad to put them to use after all.

I could see them being painted in a off white shabby chic style in a more modern house. There’s many ways to customize their look or to use them.

Hair day

Posted on

For a while I have wanted a special place to hang my hair clips and some other hair accessories. I’ve browsed the web in search of ideas. My main requirement was that it need to be easy and do not require too much assembly nor any expensive materials. After months of research and tinkering I found something easy and quick. It took me only 10 minutes to put it together.

My new hair accessories holder

All you need to replicate this hair accessories holder is:
– a horse shoe (mine was already painted)
– a ribbon (mine was from a pajamas I bought a while back)
– a hot glue gun
– some rhinestones (I got mines from the dollar store)

To assemble it just glue the ribbon to the horse shoe. I overlapped the ribbon in the back so I glued fabric to fabric to ad some strength. Then glue the stores as you please. Being a debutante in the glue gun thing I had quite an hard time gluing those little stones. But that’s me and my clumsiness.

Close up on the shoe


another close up


Don’t mind the glue in the last picture. I didn’t post a picture of what I looked like. I had to battle the glue webs trying to embed me to my seat! The horseshoe is just an idea that I had. You can use practically anything you like to create your very own hair clip holder. It would also be a nice Christmas present for a lady or girl you know.

Happy Crafts!

Recycling idea: shoe rack

Posted on

This is an idea I came up with while I was searching for a way to keep a few pair of shoes by the door. I have big and small dogs living with me. My shoes were kept by the door in a narrow hallway. Every time the dogs would go by there I’d be sure to have a few single shoe or pairs to go with them. I started thinker about something to use to that effect. I was not into those fancy and expensive racks you get in stores but into something cheap, portable and easy to clean. I remembered that old broken magazine rack I had put away in the garage. What was broken was a few spindles and missing some wood buttons. Perfect! It’s the perfect deal. It holds 4 pair of shoes, the bottom part is removable and with the handle on top it’s portable. Plus, it’s off the ground so there’s less dirt and dust on my shoes.

Magazine rack

Magazine Rack with Shoes


Feel free to use my idea. Recycling and reusing can be simple and easy. Happy recycling!

DIY: Rust removal on chrome

Posted on

For people that like shiny chrome there’s nothing worst then having it rust. I usually get bicycle that have rust on their handle bars, chain rings and other parts. That doesn’t look good. But it doesn’t have to stay that way. Unless the chrome is really rusted through there’s most likely a chance to bring it back to his like new shine. You don’t need to spend a fortune  into it and most of the time it takes a few minutes depending on the surface. In this post I will show you how to do it.

You will need:
– WD 40 or Varsol
– a Scotch bright pad
– a brass brush (nylon are too soft and steel will scratch)
– a rag
– protection glasses
– a rusty chromed item

What you need


Please wear the protection glasses while doing this as WD 40 and Varsol are toxic and you wouldn’t want them in your eyes. I also recommend rubber gloves and and something to cover your clothes as these products will stain. I also recommend to install yourself on a surface you don’t mind damaging or outside somewhere safe. A well aired area is a must have. Vapors from WD 40 and Varsol are not good for you.
I choose to make the demonstration with an old 10 speeds chain ring. The green rusty thing in the picture is my scotch bright. It’s well used and yes I need a new one. This poor thing have suffered enough!

Now, I’m in a WD40 mode lately but Varsol work just as good. Instead of spraying the Varsol pour  some it in a container you won’t need anymore.  Take your item and spray some WD 40 on a small area. For those using Varson dip the Scotch bright and apply on the rusty item. Then start scrubbing with the pad. If it’s too much work use the brass brush applying some pressure. Once the first area is scrubbed wipe it with the rag to see if there’s touch ups to be made. Then spray another area, scrub, wipe and keep going until the full piece is done. At the end give a good wipe to the full piece and you are done.

Results


My chain ring took me less than 5 minutes to do. It’s looking good. I the back side of it is still rusty as I haven’t done it. Maybe a total of 10 minutes no more would have been required to do this piece.

Note: I have noticed that chrome fenders on bicycles are easy to scratch. I use the Scotch Bright as much as possible to not alter the finish. Before using the brass brush test in a hidden area to make sure it won’t scratch.

I find it fun do clean rusty chrome as the result is great. A nice shiny chrome piece. How nice! Have fun cleaning your pieces.

Recovering a chair

Posted on

I sometimes get asked how to recover chairs. So I will do a quick tutorial on how to recover a chair. It’s quite simple and require no sewing.

What you need:
– Scissors
– Heavy cotton
– Stapler with staples (short staples and a construction stapler not a paper one)
– new foam pad (optional if the old one is still good)
You might also need a screwdriver or allen key if your chair as the corner brackets.

First unmounted the padding area. Some have the corner brackets and some have a spinning device. My chair is from IKEA.


Once the fabric pad is off it should look like this.

Then remove the fabric. Mine was torn apart so I just pulled it off. Once its done place your pad with the foam on the fabric you’ve picked and measure it. Leave about 3-4 inches on each side. Mark your edges and cut your piece of fabric. In my case I just left the pad into place and cut around it.  Then you are ready to recover. You will need the staple gun loaded to start this part. Fold the first side of the fabric trying to preserve the 3-4 inches of fabric on each side and staple in the middle. I usually make an nice edge to have a better finishing. Then go to the opposite side and do the same but pull on the fabric to put tension on it. Then do each side applying tension. Then start working your way through all the edges until you’ve reach the corners. You can then make a nice fold. I keep a equal distance within each staples to make a nice finish. Also be careful of the tension on the fabric. You want it tense enough so there’s no fold on the other side but loose enough so the fabric doesn’t tear apart when someone sits on the chair.

This is what it should look like. You can even do better! The black fabric was already there when I got my chairs but you can always find some at the fabric store.

Once the recovering is done put your chair back together and it’s not ready to be used again.

Happy recovering!

Any questions on this project? Go to my contact page and send me a line. I’ll be happy to help.

Headbage frame

Posted on

I’m in the process of making a headbadge frame with bicycle headbages. I have a few and I wanted to display them better than in the china cabinet. This is a mock up but it shows what the final will look like.

Basically what you need is:
– a deep frame
– sponges (the dollar store kind)
– a dark mat fabric
– sewing pins
– knife exacto type to cut the sponges
– school glue
– and scissors
You will also need something to put on it. I picked headbages but you can pin pictures, earrings, whatever you like.

I will post the “tutorial” for a DIY  as I finish the project. Stay tuned!